If you are looking for some awesome fixes to your 100% disk usage Windows 10, then you have surely landed on the best page. Before that lets take at look at all the points which will help you to understand if you are actually facing the issue of 100% disk usage on windows 10:
- Lag in opening any folder: All the icons of the folder take a good time to load and also the green bar available at the upper portion of Windows Explorer fills at a very slow pace.
- Random lagging: You will notice that your system is lagging and taking even basic actions such as loading menu or clicking on icons and many more.
- Slow Gaming: From launching to loading new levels in your favorite game, it starts consuming time as the hard disk is having a bad time keeping up with your gaming activities due to lack of disk space.
- Streaming Issue: the audio and video players will have interrupted pauses, continuous buffering or poor quality of the video that will definitely spoil your online streaming experience.
This article offers 16 bestest solutions to solve your 100% Disk usage Windows 10, let’s take a glimpse of all the methods in go:
- Reboot your system
- Swap energy options from Balanced [ACTIVE] to High performance
- Change Google Chrome settings
- Installing the recent SATA drivers
- Removing malware infections
- WaasMedicAgent.exe error
- Stop Windows Help
- Reset virtual memory
- Erasing temporary files
- Ceasing the SuperFetch service
- Uninstall updates of Flash player
- Immobilize diagnostic tracking
- Reinstall or reset synchronization tools
- Upgrade RAM
- Update hard drive firmware
Method 1: Reboot your system
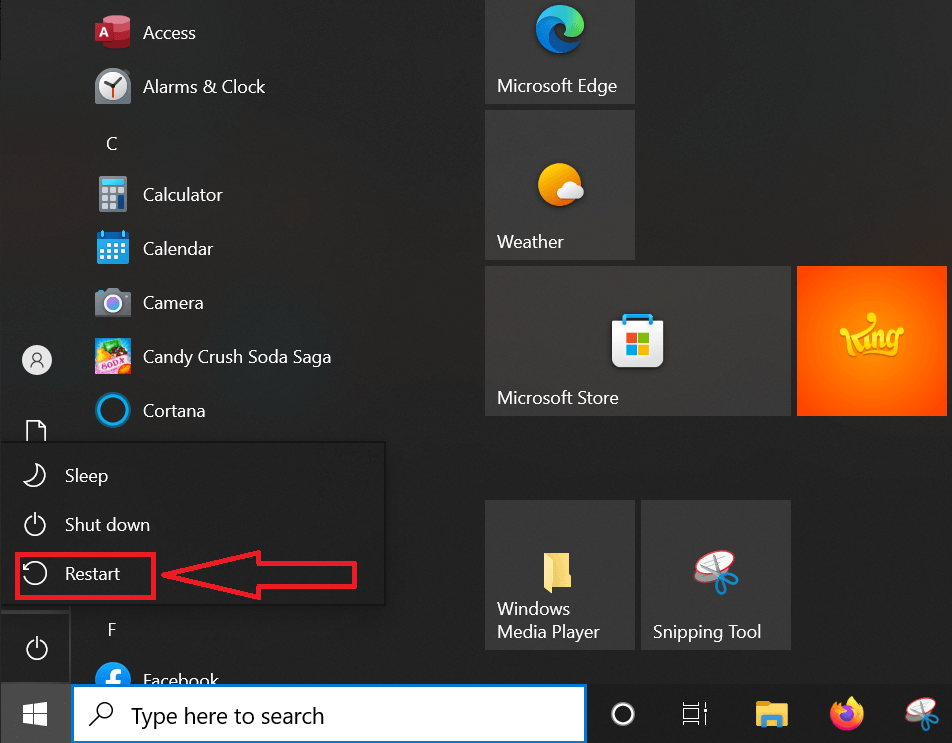
We all know from now – how rebooting the system can mostly solve the issue that you are encountering. Your 100% Disk usage Windows 10 problem is no uncommon issue. You might not be able to find out the main reason behind your issues but this fix method has good chances of work. Just pay attention while hitting the restart button as there are a couple of similar options like shut down and Sign out.
This is the simplest and easiest way that is why it tops the chart.
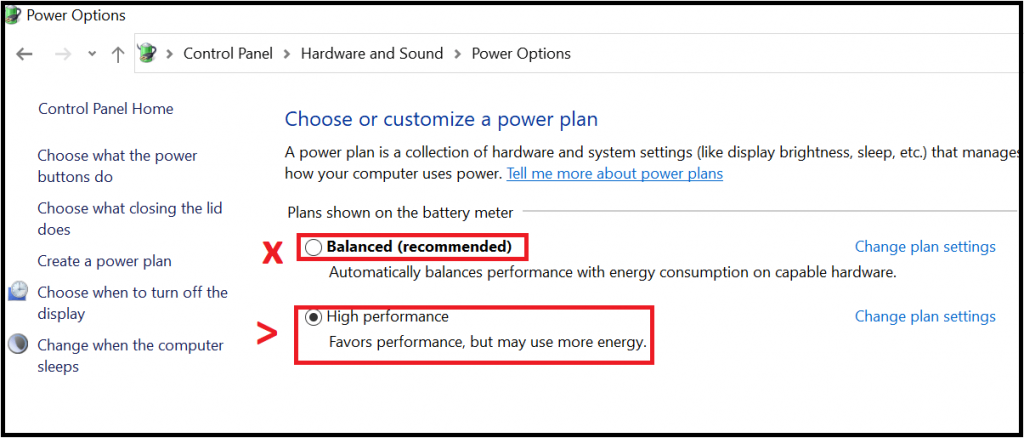
Method 2: Swap energy options from Balanced [ACTIVE] to High performance
According to the majority of the users, swapping balanced to high performance works well on 100% Disk usage Windows 10. To do the same you need to follow the following steps:
- Navigate to the power options
- Change the plan settings
- Hit on Advanced settings and pick high performance from the drop down box and confirm that all the plan settings are set as default.
Method 3: Change Google Chrome settings
Giving a change to your Google Chrome settings can be a good idea to eliminate the issue of 100% Disk usage Windows 10.
- Navigate to the google chrome “settings”.
- Pick advanced options and tap the “privacy and security” category.
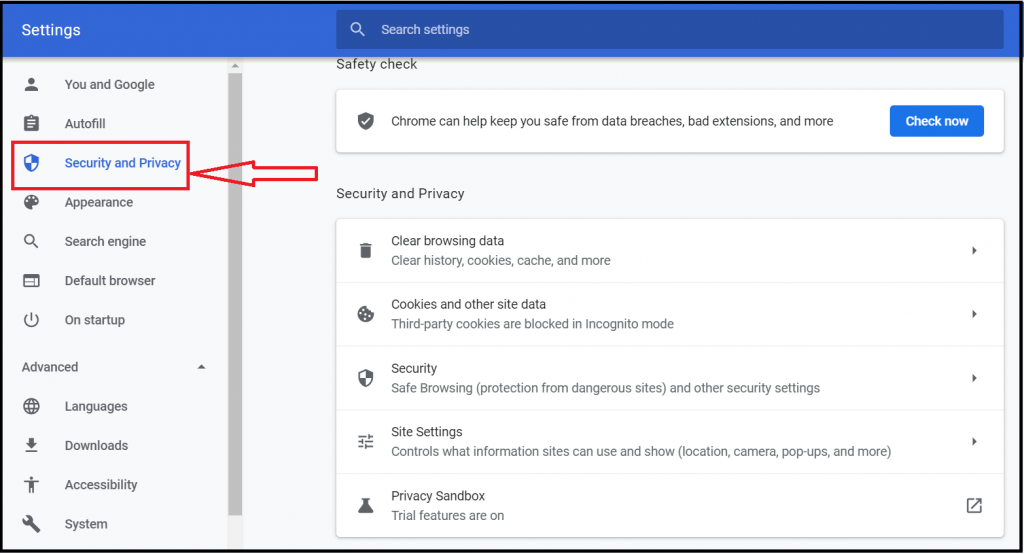
- Ensure that “Use a prediction service to load pages more quickly” is toggled off.
- Make sure that “Continue running background apps when Google Chrome is closed” option is turned off in “System” settings.
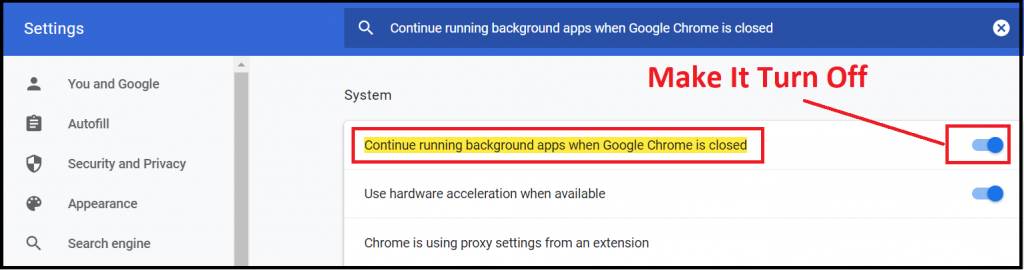
Note: Also ensure that Flash is disabled in Google Chrome.
Method 4: Installing the recent SATA drivers
Windows 10 PC employs SATA connections for optical drives, SSDs and hard drives. If the drives are not updated according to the recent standard then the disk usage error can occur. Follow the steps written below:
- First, right click on start button
- From the power user menu choose Device Manager
- Upon clicking the storage controller a drop-down list will pop up.
- Find out the appropriate controller according to your SATA devices.
- To finally update, right snap on each controller and locate the update driver.
- Pick the Browse my computer for driver software option.
- Thereafter look for the “Let me pick from a list of available drivers on my computer” option.
- Finally hit the Standard AHCI Controller and check the impact on your system’s performance.
You may have to reboot or restart windows for the same to come into action. You can move to the manufacturer’s website to install a new driver; just follow the webpage’s instructions and you will be able to install a latest driver for your PC. The 100% Disk usage Windows 10 will now no longer be there if the issue was within SATA drivers.
Method 5: Removing malware infections
It could be a virus, malware infection or other spyware. Adding to that malware also robs your app or personal data. Following the below step can help you get rid of the problems revolving around viruses & malware infections.
Upgrade your antivirus software or you can even get it installed if you don’t have one. As malware plays a critical role in pushing windows 10 to 100% disk usage and that leads to it getting corrupted. Install a free antivirus tool or scan your machine to diagnose any possible malware or performance issues.
Method 6: WaasMedicAgent.exe error
WaasMedicAgent.exe is basically a key element of the Windows Update Medic Service. Its role is to scan the downloaded files for Windows update. And if it finds any error with the data files, then they are redownloaded and this could cause 100% disk usage. Follow the below instruction to disable the WaasMedicAgent.exe are as follows:
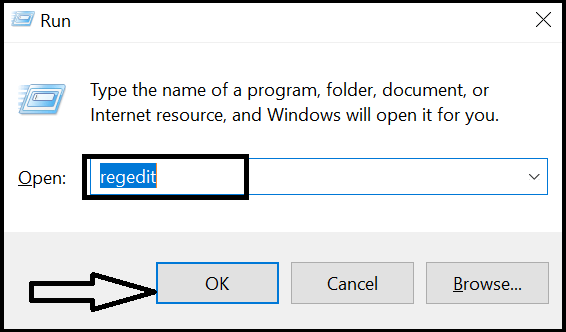
- Click the window logo key and R simultaneously to start a Run box
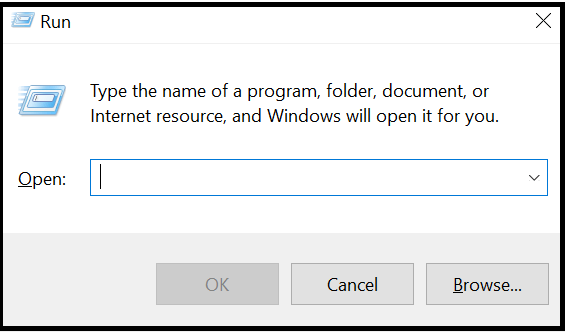
- Hit OK to launch the Registry Editor once you enter regedit.
- If you want your backup secure somewhere have a registry backup by File > Export, saving the backup somewhere safe
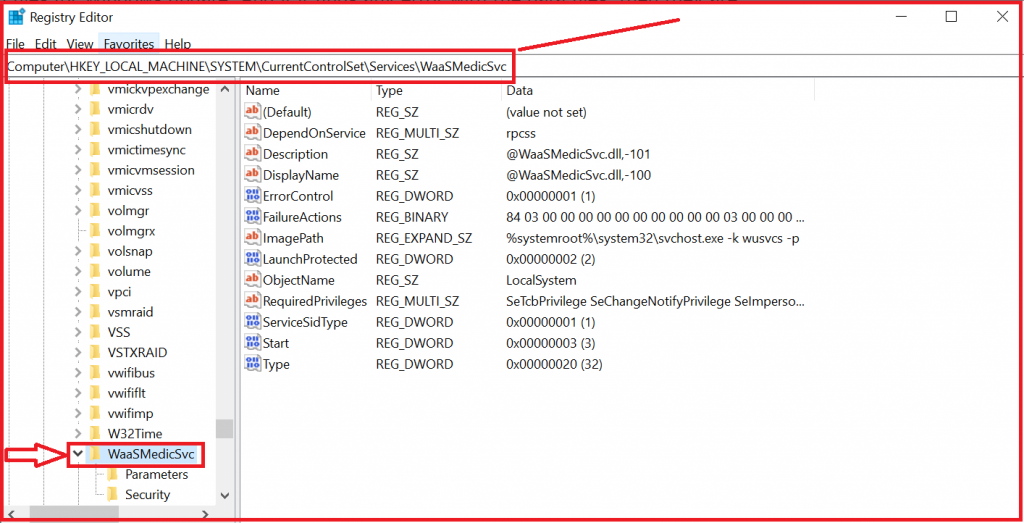
- Paste this address in the search field of your web browser – Computer\HKEY_LOCAL_MACHINE\SYSTEM\CurrentControlSet\Services\WaaSMedicSvc
- In the right side, right-click on Start and pick Modify
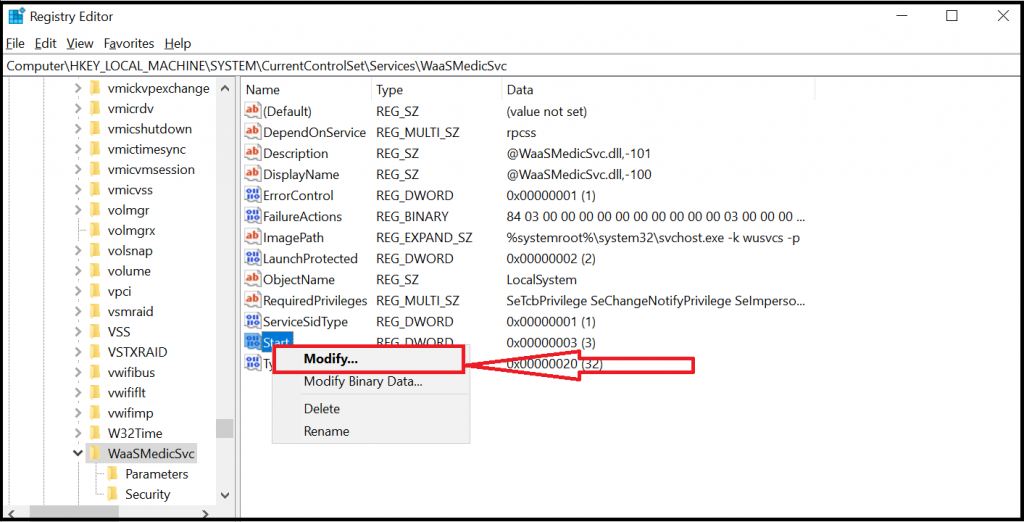
- Reset the Value data to numerical number 4 then hit OK
Note: Before clicking OK, make sure the value name is given as Start and base is chosen as Hexadecimal.
Method 7: Stop Windows Help
Windows 10 comes loaded with an in-built tool which shows you the necessary suggestions if you are exploring something for the first time. Here is how you can disable it:
- Open Settings by clicking “WIN+I “keys.
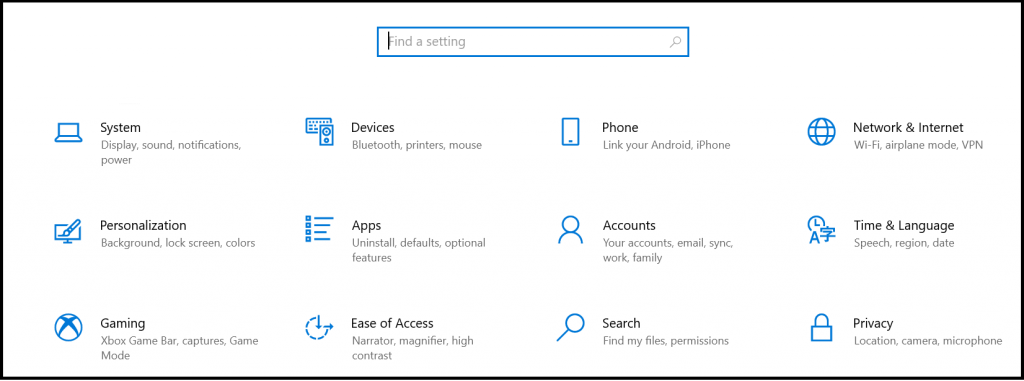
- Go to System and then pick Notification & actions from the displayed menu.

- Locate and uncheck the “Get tips, tricks and suggestions as you use Windows”.

Once you disable it, you will notice immediate improvement in the 100 Disk Usage Windows 10 issue.
Method 8: Reset virtual memory
We can perform this task when the RAM isn’t able to carry out its functions, Windows 10 keeps its files in virtual memory, then exchanges them back to RAM whenever needed.
To reset virtual memory, you have to go through the following steps: –
- Snap the windows key and Pause/Break button at the same time. Thereafter select advanced system settings on the left side of the panel.
- Under the advanced tab, navigate to Performance and then Settings.
- Move to advanced tab for one more time and then select the option change under the section of virtual memory.
- Make sure that the checkbox that says automatically manage paging file sizes for all drives is unticked.
- Choose the windows drive (generally C:) and then select Custom size. type the initial size (MB) in the first cell and then maximum size (MB) in the next one.
- After you have inserted the values of virtual memory, hit Set and snap OK to proceed further.
- Clear the computer’s “temporary” files stored in the virtual memory location.
- Hit the windows key and R key at the equivalent time to open a run box.
- Enter temp and snap the OK button/Enter key.
- Now in the Temp folder, pick all the files by pressing Ctrl+A and snap delete.
[Note: If you are not aware what to fill in the Initial and Maximum size, then rely on the recommended values given. Example: A PC with a 4GB RAM can’t have beyond 1.5 times of the system’s RAM.]
Finally look at your PC’s disk usage: For this you have to enter “task manager” in the Windows search field. Then choose task manager and under the processes tab, take a look at the % appearing in the disk column. If the figure is not 100%, then you definitely have conquered your 100 Disk Usage Windows 10 issue.
Method 9: Erasing temporary files
This method supports you to create space and prevent problems. There are still a few cases where these temporary files can make a windows process or app to increase the temporary files upto thousands and push the disk usage to 100%. Erasing these temporary files would definitely solve the issue. You have to clear up the temporary files on a regular basis and you can establish this by following these steps:
- Download the AVG TuneUp application
- There is a disk cleaning functionality feature in it.try it.
- This will check your system thoroughly for any bloatware or junk files
- It will allow you to securely delete all the junk files and render your PC back to its best performance level.
Method 10: Ceasing the SuperFetch service
SuperFetch features generally function in the backdrop of Windows. Its main role is to keep a check on the RAM usage by analysing the usage patterns of apps occupying more storage space. Now, it also involves writing the preloaded data to the drive often. You can debilitate this service for a short time by following any of the two ways mentioned below:
- First click “Win+X”.
- Pick “Command Prompt (Admin)”.
- Thereafter, type “net.exe stop superfetch” in the window of Command Prompt.
OR
- First, click “Win+R”.
- Enter services.msc in the search bar and tap OK.
- A big list of all the services that your Windows is running will display on the screen, locate SysMain option.
- Under the General tab, click Startup type and go for Disabled option.
- Lastly snap OK to process all the changes.
Now, reboot your PC to check the improvement in performance. If you don’t see the desired result, turn on the Superfetch again and follow all the steps as mentioned in the 2nd method except to choose Automatic instead of Disabled option.
Method 11: Uninstall updates of Flash player
Deinstalling all the flash player updates is also referred to as a nice solution that has till now helped few users to resolve the issue related to 100% disk utilization problem in windows 10. To perform the following function, follow the following steps:
- Navigate to settings and hit “Update & security”.
- Go to the Windows Update, then pick Advanced Options.
- Now see your update history
- Click on Uninstall updates, thereby deinstalling all the updates relevant to Flash player.
Method 12: Immobilize diagnostic tracking
Diagnostic tracking leaves a considerable impact on your windows 10. This feature has been pointed out as one of the significant reasons for 100% HDD use on plenty of PC’s. To do the same follow the following steps:
- Hit start and enter cmd in the search field.
- Choose to run as administrator.
- Enter sc config “DiagTrack” start=disabled.
- Enter sc stop “DiagTrack”
Now after you have followed all the prior steps, shut the command prompt box and also you will have to reboot your Windows.
Similar Post: How To Fix Windows 10 update error 0x80070002
Method 13: Reinstall or reset synchronization tools
There are tools like Dropbox or OneDrive which basically synchronize all the files. But sometimes these tools can force the disk usage to 100% as they keep on attempting to synchronize even after the process is finished. This situation is generally experienced with a humongous quantity of data.
You can fix it either by installing the programs back or resetting them or might want to install them. You can also reset OneDrive by following procedure:
- Click Windows key + R key together to launch the Run box.
- Insert the given command – %localappdata%\Microsoft\OneDrive\onedrive.exe\reset
- Thereafter snap OK and OneDrive will surely give a reset and resynchronize your files. Hence your issue with 100% disk usage be resolved.
Method 14: Upgrade RAM
If you feel that you need more disk space and lack of RAM, that is physical memory is posing a difficulty for you, then you can very easily upgrade your RAM, that too in a cost-efficient manner. And another added benefit is the PC starts operating much more smoothly as an outcome of increased space.
Related: Upgrade your windows to 11
Method 15: Update hard drive firmware
The software aka hardware installed in the hard drive assists in fixing irrelevant read/write operations to help out to resolve performance related trouble. In order to check if your firmware requires an update or not, you can follow the given series of steps:
- To know the hard drive that you are currently operating, you have to right snap on the Start logo.
- A menu will pop up, pick the Device Manager from it.
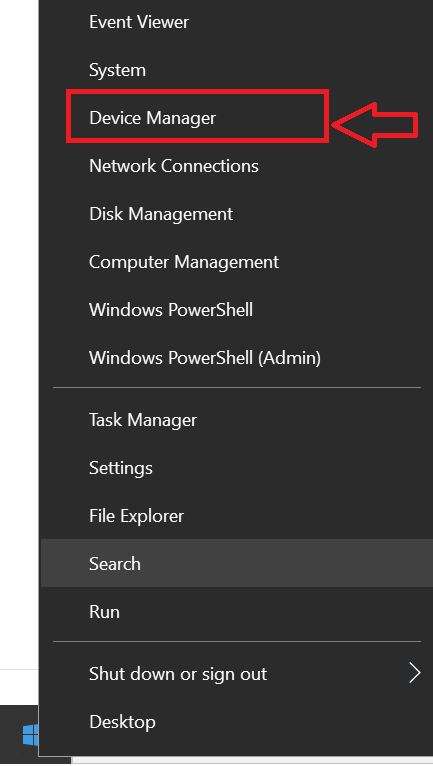
- Double tap on the Disk drives option and view the hard drive’s name.
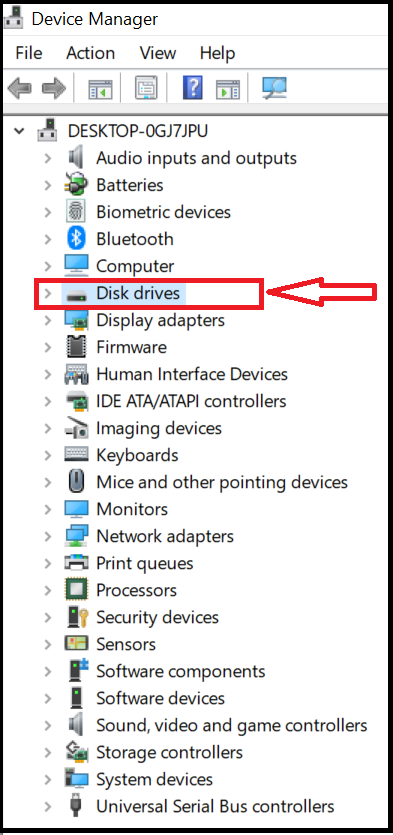
- Thereafter launch the support page of the desired drive and check for the updates.
- If any new firmware is present, just hit download.
Once the firmware is downloaded, restart your PC and you will have your issue resolved.
Method 16: Rebuild the Windows Search index
There are hundreds of files, folders and applications in our PC system. Windows Search Index just makes our life just so simple as whatever we are looking for, we can simply type it in the search bar and give an “Enter”. That’s it, you have got your desired file/folder/application. But do you know that all these searches are saved and that could definitely pile leading to 100 disk usage Windows 10. Here is how you can disable it in both the ways:
– Disable Windows Search (Temporarily)
- Click the combination of “Win+X” keys and pick “Command Prompt (Admin)”.
- Input “net.exe stop “Windows search” in the Command Prompt box and snap enter key.
– Disable Windows Search (Permanently)
- Launch the run box by pressing the combination of “Win+X” keys.
- Enter “services.msc” and press Enter.
- Now, a list of all the services available on your PC will load.
- Navigate to the “Windows Search” and double tap to open the “Properties” window.
- Under the general tab, pick the Startup type option of “Disabled”.
- Lastly, press “Apply” and “OK” to process all your changes.
Related: Fix windows 10 version 1903 error 0xc1900223
Congratulations, your issue must have been resolved by now.
Hope you get the desired support that you were looking for to rectify the issue of 100 Disk Usage Windows 10 through this piece of writing. There are plenty of fix methods provided, so even if a couple of them don’t work, don’t get disheartened as there are plenty more to try. It’s worth your effort!


Leave a Reply